.png?width=189&height=28&name=Multihub%20Logo%20Color%20(1).png)
Your VibeSite has a dedicated Gallery page that showcases property photos for prospective residents. The images displayed there are controlled entirely through the Photo Gallery Collection in your MultiHub property dashboard.
MultiHub is the single source of truth for your Gallery page. If photos are missing or incorrect on your live site, check MultiHub first — it is almost always a data issue rather than a site issue.
To access Photo Gallery:
In MultiHub, go to your property workspace → Dashboard, scroll down to the Photo Gallery section, and click Edit.
Understanding Your Data Sources.
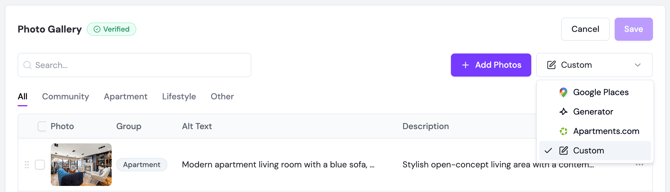
Your gallery can pull images from every platform connected to your property. Use the source dropdown to filter your gallery by origin. Available sources depend on which platforms your property has connected, and may include: PMS, Apartments.com, Google Places, or a Custom Source you create.
💡 Custom photos take priority. When your Gallery page displays images, custom photos are shown first — regardless of what other sources are connected.
Adding Photos to Your Custom Collection.
Your Custom collection is your curated set of photos — what you add here is what appears on your Gallery page. You choose exactly which photos to include, whether that's pulling from your connected sources or uploading new ones entirely.
- Select Custom from the source dropdown.
- Click + Add to add photos. You have two options:
Pull from a connected source — browse photos already associated with your property from Apartments.com, Google Places, your PMS, or any other connected platform, and select the ones you want on your Gallery page.
Upload new photos — add photos that aren't in any connected source.
- Assign a Classification to each photo so it appears in the right section of your Gallery page.
- Click Save when done.
💡 Custom photos always take priority. Whatever you add here is shown first on your Gallery page — above any photos pulled automatically from connected sources.
Editing or Removing a Photo.
- Click the three dots (...) to the right of any photo in the list.
- Select Edit to update the title, classification, or alt text — or Delete to remove it.
- Click Save when done.
Pushing Changes Live.
After saving, redeploy your site. See How to Deploy Site Changes for instructions.